Knowledge Base
How do I set up a cell phone signal booster in my home?
Self install vs. professional install
The first decision to make is whether you’re going to install a signal booster system yourself or if you’re going to have a professional do the installation for you.
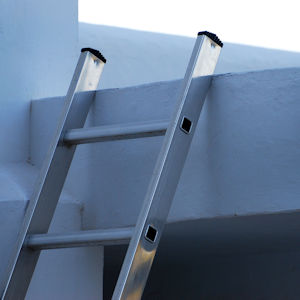
Option 1: Self-installation. Most cell phone signal booster systems are self-installed kits and include installation instructions. If you have a ladder, a power drill, and some basic tools, you can complete the installation yourself, typically in one to three hours (depending on the kit and its complexity). The most challenging part of the installation for many people is pulling the booster system’s coax cables through walls to reach the booster and the inside antenna(s) (see below). Powerful Signal provides lifetime support on every system we sell; we’re here to answer any questions you have and give you advice and tips on successfully installing your system.
Option 2: Professional installation included. Some cell phone signal booster systems include professional installation as part of the purchase price. The components will be shipped to you upon purchase; once you receive them, you’ll call the phone number inside the box to schedule the installation. The installer will take signal readings before and after installation to show the difference in received signal strength. This is an excellent option if you’re happy with the components in the manufacturer’s kit and don’t need to install custom components.
Option 3: Hire a local installer. If you want or need professional installation of a signal booster that has custom components, we typically recommend that you find a local cable TV or satellite TV installer, electrician, or handyman whom you can pay to install your booster system. The installer should be familiar with pulling cable through walls. If you purchase a booster system from Powerful Signal, we’re happy to talk to your installer before and/or during the installation to make sure they get the job done right.
Test your cell signal booster system before you install it
Before you permanently install a cell phone signal booster system in your home, we strongly recommend that you do a “soft install”:
- Set up and connect all the components, but don’t permanently mount any items, pull cable through walls, etc.
- Bring the outside coax cable in through an open window or door. Place the antennas as close as possible to where you intend to install them. Connect the cables to the antennas and the booster.
- Turn the system on and see if you get the kind of results you’re expecting. If it works, finish the installation and you’re done!
- If you can’t get a system you purchased from Powerful Signal to work properly, give us a call and let us help you troubleshoot it. Powerful Signal offers lifetime support and a generous 90-day return policy on most signal booster systems we sell.
Components involved in installing a home signal booster
Most signal booster systems require the installation of four components:
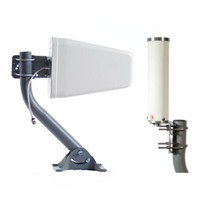 Outside antennas: LPDA (left) and omnidirectional (right)
1. Outside antenna
Powerful Signal recommends mounting this antenna on your roof, a pole, or an antenna tower. We include an adjustable roof antenna mount with many of our custom booster kits; you can also purchase one separately.
If the outside antenna is a directional antenna (an LPDA or Yagi), it’s best to have a clear line of sight in the direction of the cell tower, clear of any obstructions, for optimal performance. A directional antenna will also need to be adjusted (tuned) until it’s receiving the strongest signal. (Learn how to do this.)
Omnidirectional antennas do not require line-of-sight or tuning, but they typically have less gain and more noise than directional antennas.
The outside antenna needs enough separation from the inside antenna so that the two antennas don’t feed back on each other (a condition called oscillation). We recommend that you have at least 20 vertical feet or 50 horizontal feet between the two antennas.
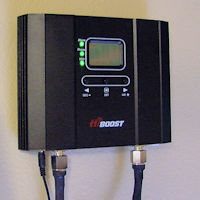 A cell signal booster mounted on a garage wall
2. Amplifier
Amplifier. The amplifier or booster will normally be mounted on a wall inside your home. We recommend mounting it in your garage, a utility closet, the attic, or another location where it’s inconspicuous but still easy to get to.
Mounting requires either two or four screws, depending on the booster model. Screws drilled into drywall should use anchors or toggle bolts![]() appropriate to the weight of the amplifier (typically less than 5 pounds for home booster units).
appropriate to the weight of the amplifier (typically less than 5 pounds for home booster units).
The booster is plugged into a standard 120-volt wall outlet, so you’ll need to have an electrical outlet near the location where you mount the booster unit. You’ll also want to use a surge protector![]() with at least a 1,000-Joule rating, as required by booster manufacturers’ warranties.
with at least a 1,000-Joule rating, as required by booster manufacturers’ warranties.
 Inside antennas: dome (top left) and panel (bottom right)
3. Inside antenna(s)
Your cell signal booster kit will contain one or more inside antennas. These will either be ceiling-mounted dome antennas or wall-mounted panel antennas.
Installing a dome antenna requires that you have access above the ceiling via an attic or crawlspace. If you prefer, you can mount the dome in a centrally located closet to avoid seeing the antenna in the ceiling of a living area. Cut a hole in the ceiling large enough for the antenna’s mounting post (about ¼″ or 2 cm in diameter), then screw the nylon nut onto the threads on the mounting post above the ceiling and attach the cable.
Installing a wall-mounted panel antenna can be simple or complex, depending on if you want the antenna and/or its cable to be concealed inside the wall. Simply hanging the antenna on the wall is quick and easy; cutting a hole in the wall, mounting the antenna in the opened space, covering the hole with drywall, and patching and painting the seam require planning, tools and materials, and some know-how![]() .
.
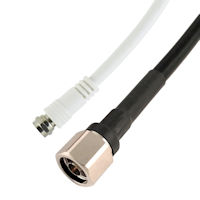 Coax cables: RG6 (left) and 400-type (right)
4. Coax cables
The amplifier connects to the outside antenna and inside antenna(s) with coax cable. Running cable through your home’s walls and ceiling is probably the most challenging part of setting up a cell signal booster system; fortunately, there are many websites![]() and YouTube videos
and YouTube videos![]() that can teach you how to do this. You can also easily run cables across attic floors.
that can teach you how to do this. You can also easily run cables across attic floors.
Your cell signal booster system may use 75-ohm RG6 coax cables with F-male connectors, the same kind used by cable and satellite TV systems. Boosters for larger homes often use 50-ohm 400-type coax cables with N-male connectors or 75-ohm RG11 coax with F-male connectors.
For best performance, use the shortest run of cable possible to the outside antenna. If you have excess cable in a run to an outside or inside antenna, snake it back and forth or run it out and back, but do not coil it.
Need help?
Powerful Signal is here to help you at every step in the process of setting up your home cell phone signal booster. We’re dedicated to making sure your installation is successful and that your booster system works the way it should. If you have any questions, please don’t hesitate to contact us!